

An engine that revs freely but the ski won't get on plane, or that surges and whines instead of pulling cleanly out of the hole, isn't an engine problem at all — it's almost always the jet pump losing its grip on the water. The fix isn't a tune-up, it's a physical repair to the pump itself: the impeller, the wear ring it spins inside, or debris jammed somewhere in the intake path. This is the hands-on procedure for pulling the pump apart, figuring out which of those it is, and putting it back together correctly — a job that's well within reach with the right tools and a little patience.
Why Clearance Loss Causes Cavitation
The impeller doesn't touch the wear ring — it spins inside it with a small, deliberate clearance, close enough that water gets shoved rearward through the volute instead of slipping back around the blade tips. That tight clearance is what turns blade rotation into thrust. As sand, grit, or the occasional rock passes through the pump, it erodes both the impeller's leading edges and the inside face of the wear ring, and the gap between them grows. Once that gap opens up, water finds it easier to recirculate around the tip of the blade than to get driven forward — the pump is spinning hard but slipping, the same way a wrench with rounded-off jaws will spin on a bolt head instead of turning it. That's the mechanical root of cavitation: RPM climbs, but thrust doesn't follow it.
Clear the Intake Before You Touch the Pump
Before assuming a worn wear ring, rule out the simpler cause: something caught on the intake grate or wound around the shaft ahead of the impeller. Rope, fishing line, and zip ties are the usual offenders, and they don't just block flow — line wrapped around the driveshaft in front of the impeller can melt from friction heat and fuse itself in place.
- Disconnect the battery first. Reaching fingers or tools anywhere near the driveshaft and impeller while there's any chance of the engine turning over is a real way to lose fingers, not a theoretical one, which is why this step is worth treating as non-negotiable rather than a formality.
- Tip the ski or get it on a lift so you can see up into the intake grate and pump tunnel.
- Use a hook pick or needle-nose pliers to work debris out rather than pulling straight — wound line tends to be under tension and unwinds easier than it pulls free.
- If line has melted onto the shaft, it may need to be cut away in sections rather than stripped in one pull.
If the grate is clean and the shaft spins freely by hand with no line wrapped around it, the problem is inside the pump itself.
Pulling the Pump
The exact fastener layout varies by model, but the sequence is consistent across most PWCs:
- Remove the coupler or driveshaft connection between the engine and the pump shaft, noting which way the coupler is indexed — most are splined or keyed and only go back one way, but it's still worth marking orientation before separation.
- Remove the housing bolts holding the pump assembly into the hull tunnel.
- Draw the pump straight back out of the tunnel. It may be sealed with an O-ring that's been in place for years, so expect some resistance breaking that seal free — keeping any prying pressure off the housing's finished surfaces avoids gouging them in the process.
- With the pump out, remove the impeller — typically threaded onto the shaft, so it backs off with a strap wrench or impeller-specific holding tool while the shaft is held from turning.
While it's apart, this is also the point to check the driveshaft bearings and seal for play or water intrusion, since you're already doing the labor to get here.
Inspecting the Wear Ring
Pull the wear ring (or inspect it in place if it's bonded into the housing) and look for a distinct groove pattern worn into its inner face where the impeller blade tips have been tracking. Some wear is normal over time; the question is how much clearance remains.
- Measure the gap between the impeller blade tip and the wear ring with a feeler gauge at several points around the circumference for the clearest picture. An asymmetric reading — tight on one side, loose on the other — points to a bent shaft or worn bearing letting the impeller run off-center, which won't be fixed by a new wear ring alone.
- Compare the measured clearance against the spec for your specific pump — acceptable clearance varies by pump design and impeller diameter, so check the manufacturer's service spec rather than assuming a universal number.
- Discoloration or a glazed, polished look on the wear ring surface is consistent with heat from repeated slippage, another sign it's past useful service life even if the gap measures marginally within spec.
Replacing the wear ring usually means pressing or driving the old one out of the housing — some are a press fit, some are bonded and need to be cut or pried out carefully without gouging the housing bore — then seating the new ring fully flush and square. A ring that goes in cocked will wear unevenly again almost immediately, undoing the whole repair.
Inspecting and Matching the Impeller
Look over each blade for chipped edges, bent tips, or a pitted, sponge-like surface texture on the trailing edge — that pitting is cavitation erosion, the result of collapsing vapor bubbles battering the metal, and it's a sign the impeller has already been running in a cavitating condition for a while.
If the impeller needs replacement, match it by part number and pitch, not just physical size. Pitch — the blade's angle relative to the hub — determines how much water the impeller moves per rotation, and it's matched to the engine's power band. A higher-pitch impeller loads the engine harder and shifts the usable RPM range down; a lower-pitch one does the opposite. Installing the wrong pitch as a replacement won't damage anything immediately, but it will leave the ski either bogging under load or overrevving without corresponding acceleration, which just reintroduces a version of the same symptom you started with.
Reassembly and Verification
Thread the impeller back on to the torque spec for your model, using thread locker if the manufacturer calls for it — these fasteners see constant vibration and reverse-thrust loading, and a loose impeller nut backing off is one of the surest ways to end up doing this whole procedure again. Reseat the pump housing with a fresh O-ring rather than reusing a compressed one, reconnect the driveshaft coupling in the orientation you marked earlier, and torque the housing bolts evenly in a criss-cross pattern so the housing seats square in the tunnel.
Once it's back together, the real test is on the water: a properly clearanced pump should pull the ski onto plane cleanly with RPM and acceleration tracking together, no flare-up in engine speed without a matching increase in thrust. If cavitation whine or a rev-without-acceleration symptom is still present after a wear ring and impeller replacement, look upstream at the bearing and shaft alignment — a bent shaft can chew through a new wear ring just as fast as the old one.
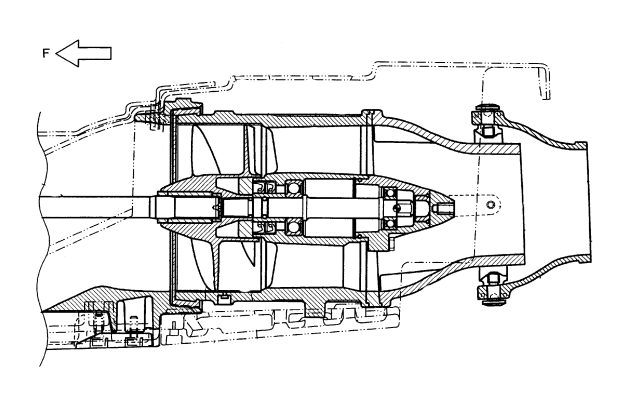
Diagram: U.S. Patent #6,682,373, public domain, via Wikimedia Commons